

My work log tech station build
Introduction
I figured, I'd go ahead and create a simple work log section, but before I do I should warn you. I really don't have the patience to get into the details such as sleeving of wires or simply letting my system be down for more than several days at a time. More importantly, water cooling is not something I do out of interest to "Show". While I sincerely appreciate a beautiful system build that I see every day, I want something I can constantly tinker with and change. I want something that easy to test on, easy to take apart, something that is function, that performs well. So I decided on putting my efforts towards function as my first priority, something easy to work on and continually change parts on.
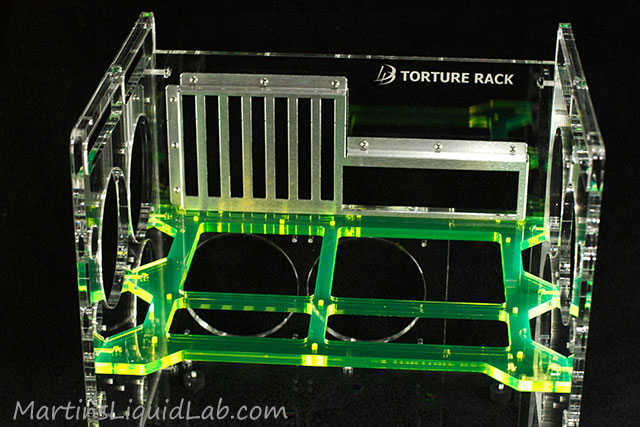
The Case - Danger Den Torture Rack
That's why after several years of using a closed case, I decided a tech station was perfect for my needs. I looked around at several different options, and landed on the a Danger Den torture rack. What appealed to me most was the potential to mount several radiator to the sides so I would have to make my own radiator mounts. In addition it includes a motherboard tray that is full accessible from the bottom for changing out block backplate and mounting systems.
Soo, with the help of some fellow supporters, particularly Andy from XS, I went ahead and placed my order through Danger Den.

I expected the case to take a couple of weeks to be built, since it's generally more of a custom order they make it sort of thing, but to my surprise the case was at my door withing only a few days.
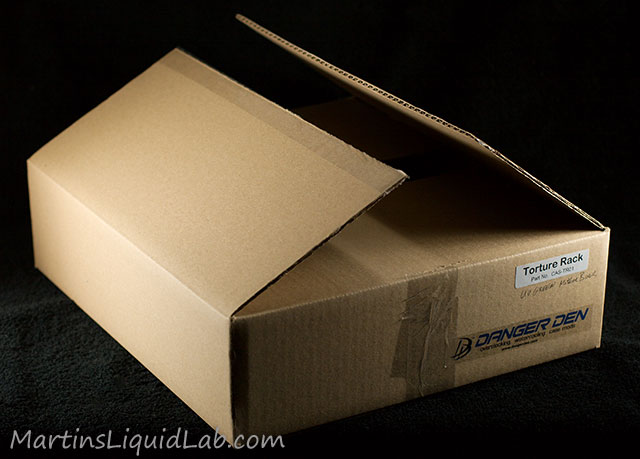
And so it begins10-13-08...this box was inside a much larger box and very well protected.
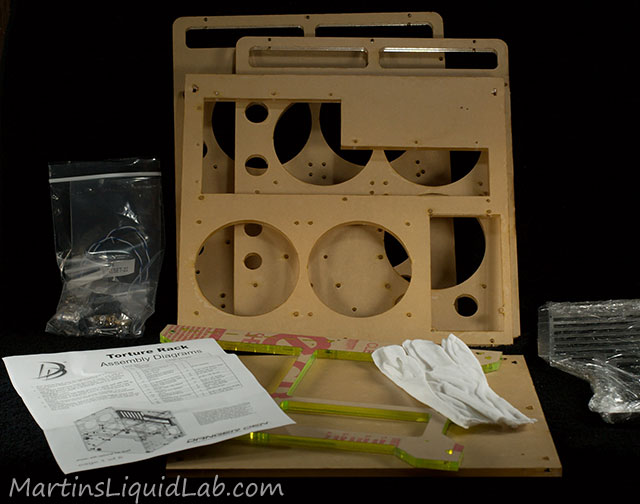
Upon opening the box, I'm presented with this. Pretty fancy, you even get a pair of cotton gloves to protect the acrylic from finger prints.
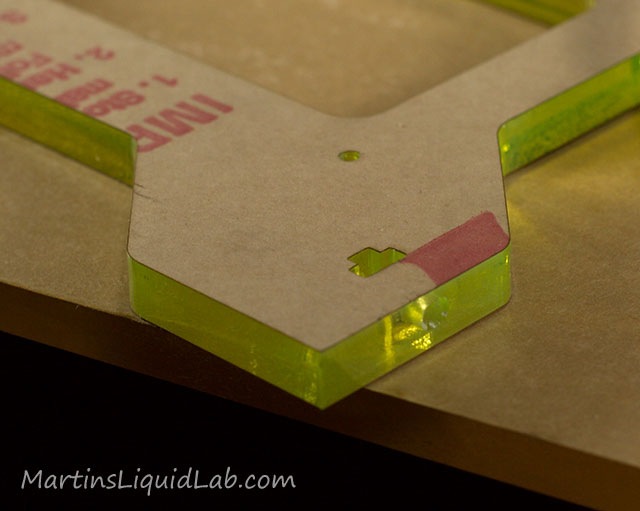
The first thing I noticed is I was wrong about how these things are cut. The burn marks on the paper and smooth side finishing is obviously due to some sort of CNC guided laser cutting machine. This is good news because laser cutting the acrylic provides a stress free edge that is much better for crack prevention than machining the shape, plus it's very accurate. Anyhow, laser cut it is...I don't even want to know how much one of those fine machines costs.
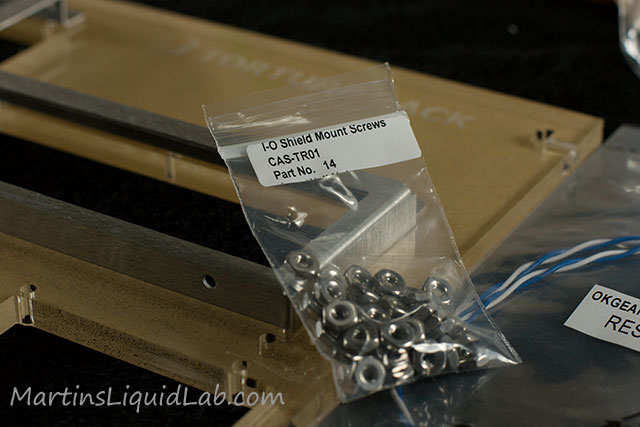
Next I emptied out the accessory package, all the like bolts and nuts are all labeled and packaged individually. The printing on my labels was off a bit, but I figured it out soon enough, the part number 14 above was correct, but they are obviously not I-0 Shield screws...must have been a slip on the printer label feed. All of the screws and hardware is really high in quality.
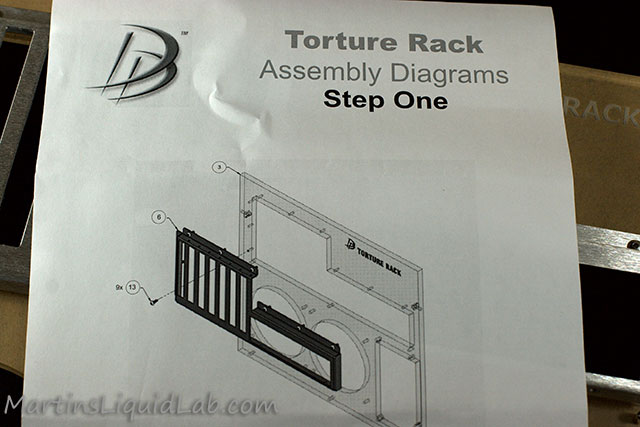
And while I usually don't like reading instructions, this is one set that doesn't really require much reading. A very simple and concise diagram, in this case I need 9 each of the #13 screws to screw down the I/O shield.
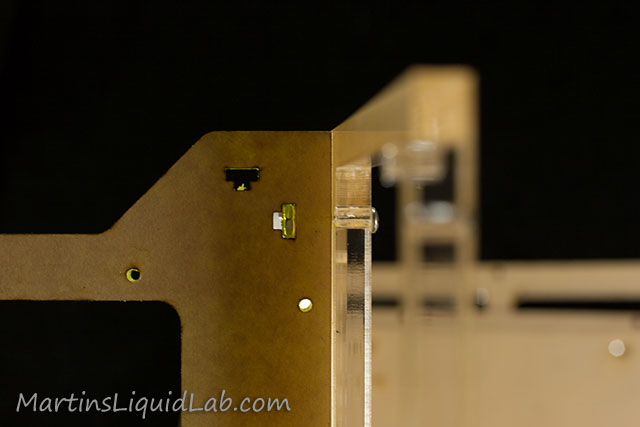
And here is a view of the screw nut system. Each of the T or corner type connections utilize this sort of nut/screw system where you slide a little nut in the slot and tighten the screw down. This ensures a nice metal nut threading and a good mass of material receiving the nut load, it's a very strong connection and more so than a simple threaded screw hole.
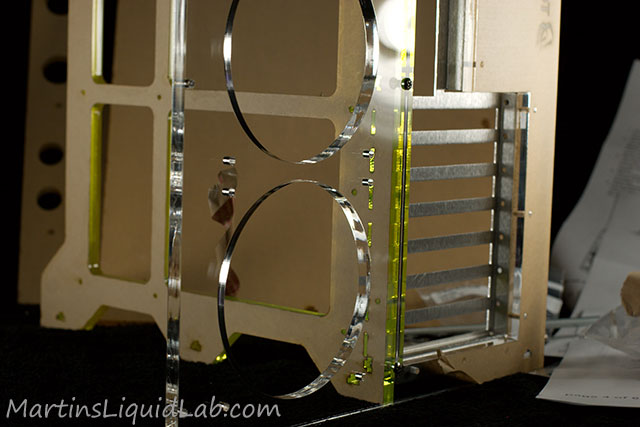
This is after step two, where you simply insert the nuts in the motherboard tray piece, match it up with the back and insert and tighten the screws. Most of the rest of the case pieces go together exactly like this, very simple and works well.
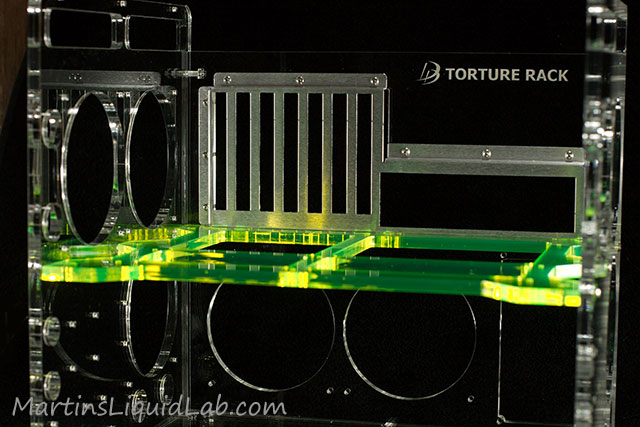
And about 30 minutes or so later, the empty case construction was done (standoffs and reset button, etc not yet installed). I like the fact that the motherboard tray is designed with large access holes and standoffs. So the motherboard does get mounted securely like any other normal case, but it has a lot of ventilation and access so you can change out block backplates and things. I selected the "UV Green" motherboard tray option to fit with the green them I was after, but you can pick any color.
Here is a better view top down looking the empty case just begging for testing gear. It also comes with a variety of screws for mounting the hard drives, 3.5" drives, and 5.25" drives. Using only the supply drive holes, you can mount 2ea 5.25 drives, 2 ea 3.5" drives, and 4ea hard drives. I ended up only using two of the 5.25" drives, one for my DVD/CD burner and the other for my crystalfontz. Then I used one 3.5" drive for my internal multi card reader, and finally three hard drives. Two are raptor drives for my system and software sections and one larger storage drive for pictures and files. But this is assuming you only want to use the predrill hole locations, later you'll see there is quite a bit of space between the hard drives, you could easily squeeze in two more if needed by either drilling your own mounting holes or making a hard drive cage to hold them. Overall I'm really happy with the options here. The most difficult part was figure out how I wanted to mount and route everything.
The Pumps - Laing DDC 3.2 + XSPC Reservoir Top + XSPC Standard Top
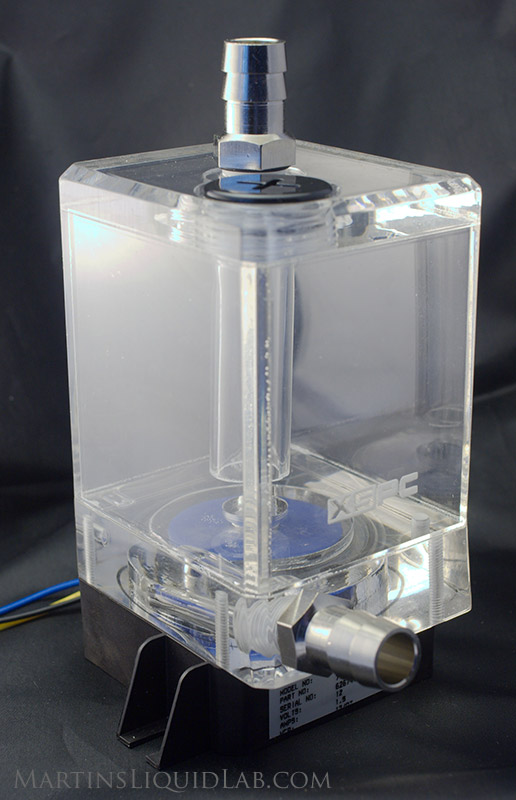
So for the pump, I decided this round I would choose two DDC 3.2's. The particular blocks and components I had in mind in separated loops were all of the high restriction category, so I felt it was worthwhile to let my D5's sit aside and run the slightly higher performing DDC's. Pumping power is one of those "MORE IS NOT BETTER", rather it's a careful balance of choosing the "RIGHT AMOUNT". Some folks will get overly into building a high dollar system for show and simply go overboard on the amount of pumping power. The overboard part is related to heat dump, and with todays very efficient and high surface area blocks, thermal gains in flow rate are quickly diminishing. Pump heat dump is however a negative aspect that will quickly overcome the gains you get from higher flow rates. So it's a balancing act, the benefits of higher flow rate block efficiency vs the negative effects of pump heat dump and that point is generally much sooner than you would think and going to depend on a lot of variables. Generally I would suggest shooting to select a pump that provides you somewhere between 1.0 and 2.0 GPM for most normal systems. I also selected the DDC pump because I like it's small compact size and with the newer blue impeller models (DDC 3.1 and DDC 3.2), they appear to be very reliable and quiet pumps as well.
The Radiators - The Feser Company 480ER and Hardware Labs 480GTX
I knew right from the start even before picking this case that I wanted to run dual 480 radiators.
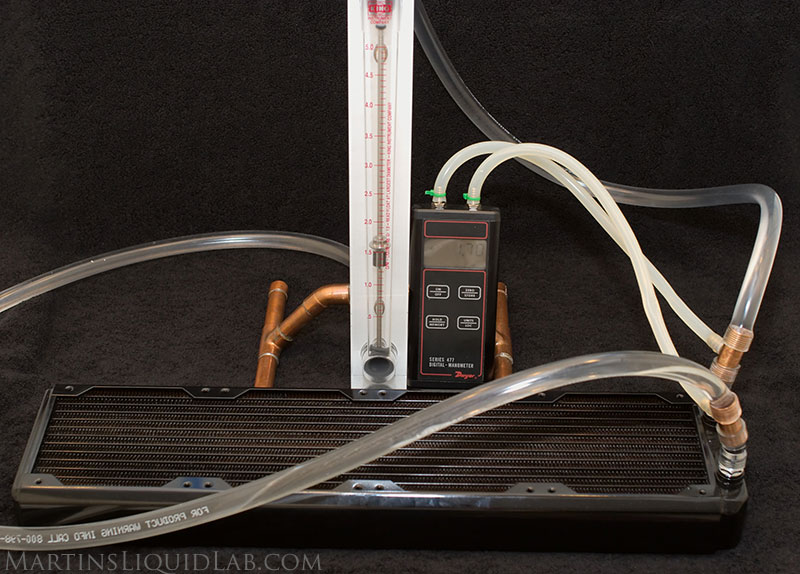
In my own testing I found both of these radiators to be exceptional performer. The TFC happens to be more optimized for low/medium speed fans, and the HWlabs radiator more optimized for the medium/high speed fans, but overall the both perform very good across all ranges and outperformed all the triple rads by a fair amount. In addition, I liked the idea of some symmetry in my radiators on both sides and these happen to be the same 15mm fan spacing that will fit the torture rack perfectly.
The Fans - Yate Loon D12SL12 "Curved Blade"
I've experimented around with a few fans and have always been a big fan of the cheap Yate Loon slow speed (D12SL12) and medium speed (D12SM12) fans. They fit my preferences for noise/performance and are very inexpensive and I have a lot of them. In addition I've been impressed with their performance as noted in the fan testing done by Vapor from Xtreme Systems here. On a radiator the "Curved Blade" yate loon D12SL12 was slightly leading the pack of fans for the most CFM per decibel. The particular "Curved Blade" part is however an important note, it has been shown to do slightly better than the more common straight blade type. Petra's Tech shop carries these noted curved blade type here. These are however the cheaper sleeve bearing types, so it's not recommended to have them in horizontal installation locations as they will wear out faster than if install on edge. I believe this is due to a combination of extra bearing pressure as well as lubrication working it's way out when the fan is sitting in horizontal or flat position.Misc. Build Photos
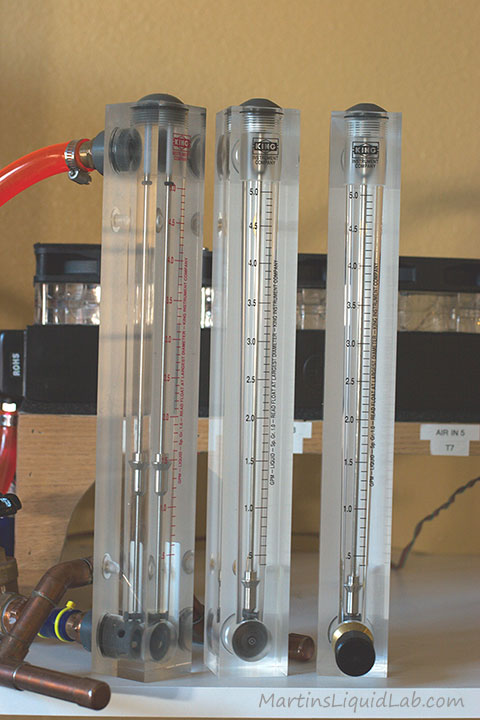
The red meter on the left is the original flow meter I have been using in all of my testing. I've been so happy with it that when I ran across a couple more on ebay for a really good price I couldn't pass it up. While I wouldn't suggest having a flow meter is necessary, it's help for testing and these are so low in restriction, I figured...why not!
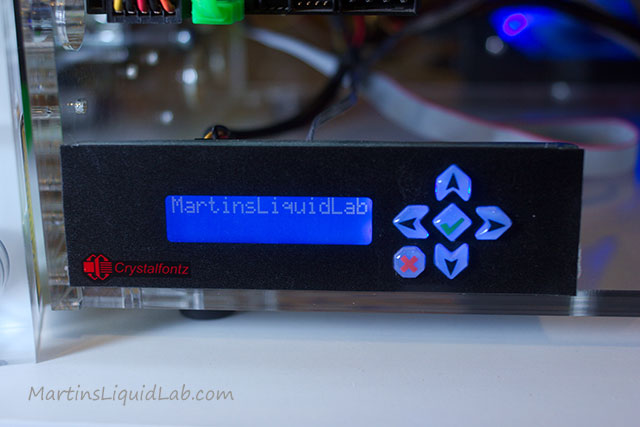
This is the workhorse data logger. Not much to it, I don't even usually use the LCD part, just the one wire sensor and logging capabilities. It is the Crystalfontz CFA-633, capable of running and logging up to 32 temperature sensors and 4 fans with PWM control.
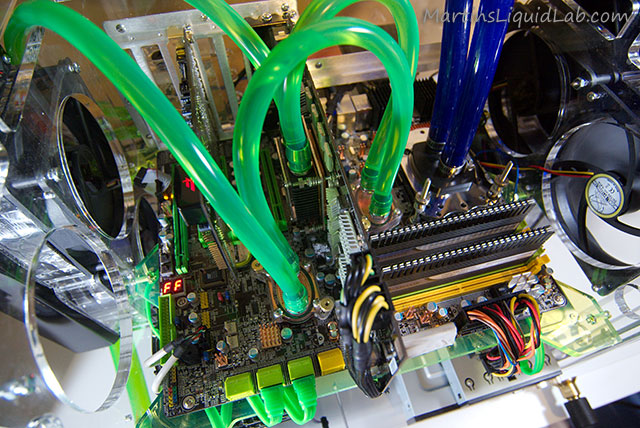
This is my current block configuration. EK supreme on the CPU and Danger Den MCP chip set blocks on the NB and SB. D-Tek Fuzion GFX on the video card. Tubing is all TFC, I figured I'd try some of the 3/8" ID x 1/2" OD tubing while I was at it, but I kind of like the looks of the larger tubing myself, so I'll probably switch out the smaller stuff in time.
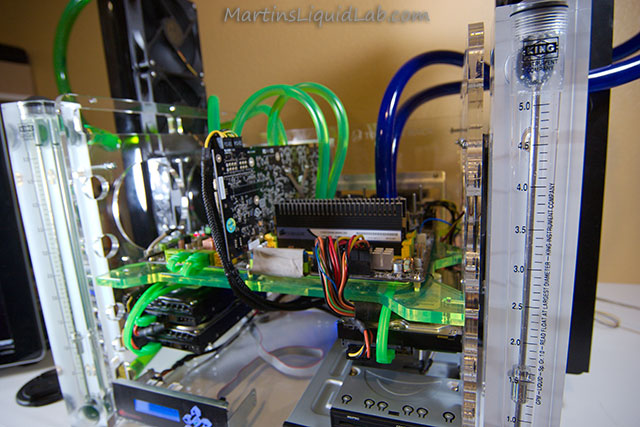
Another perspective with the twin "KINGS" in action, still bleeding the loops out.
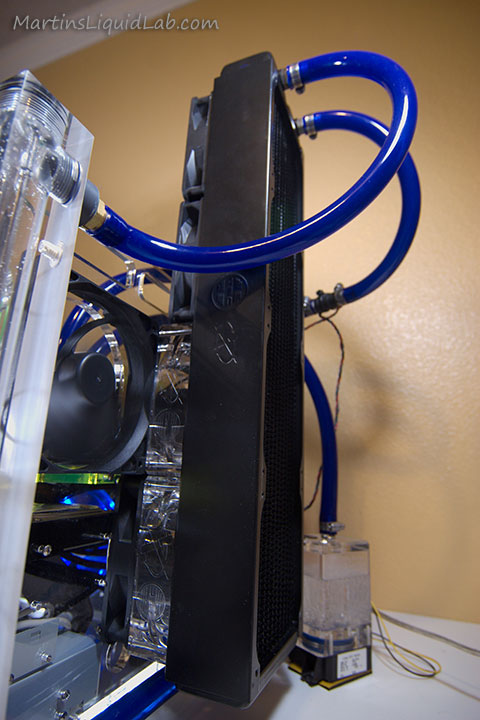
After "ALOT" of trying different things, I finally came up with this configuration for my dual quad radiator setup. This one is the TFC 480ER, and I used two TFC shrouds to pull the radiator away a little and provide clearance for the third fan exhaust. I didn't have any more shrouds other than four, or I'd use one more at the very top too. Pump is just sitting freely for the time being, going to work on some bracket/shelfs for both the pumps and the flow meters to attach appropriately. I chose this configuration so I can easily change out pump and it's all easy to access and work on.

My current configuration, twin 480 radiators and twin King flow meters were sort of part of my twin theme. That's about as far as aesthetics goes, it's meant to be a tech station and easy to work on and change out parts. I'm pretty happy with it.
Cheers!
Martin
To be continued....